Setting up PuzzleSpring on DigitalOcean
This guide walks you through deploying PuzzleSpring on DigitalOcean using their pre-configured Docker droplet. This approach provides a simple and reliable way to get your puzzlehunt platform up and running quickly.
Prerequisites
- A DigitalOcean account
- A domain name (optional, but recommended for production)
- Basic familiarity with terminal commands
Step 1: Create a Docker Droplet
- Log in to your DigitalOcean account and navigate to the dashboard
- Click on “Create” and select “Droplets”
-
In the Marketplace tab, search for and select “Docker”
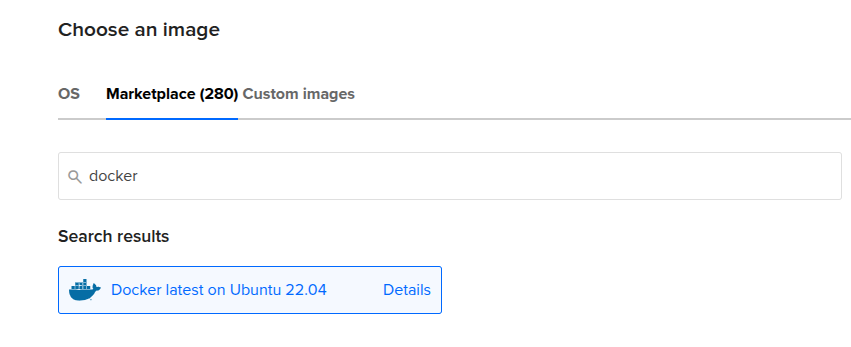 Figure 1: Selecting the Docker image from DigitalOcean’s Marketplace
 - Choose a plan based on your expected traffic:
- For small to medium hunts: Basic Shared CPU, Regular with 2GB RAM / 1 CPU
- For larger hunts: Consider 4GB RAM / 2 CPU or higher
-
Choose a datacenter region closest to your expected users
- Authentication:
- Choose SSH keys (recommended) or Password
- If using SSH keys, add your public key or create a new one
-
Add a hostname (e.g.,
puzzlehunt-server) - Click “Create Droplet” and wait for it to provision
Step 2: Configure DNS (Optional but Recommended)
If you have a domain name, you’ll need to point it to your droplet’s IP address. There are two approaches depending on where your domain is managed:
Option A: Domain Managed by DigitalOcean
If your domain’s DNS is already managed by DigitalOcean:
- In the DigitalOcean dashboard, go to “Networking” → “Domains”
- Add your domain if it’s not already there
- Create an A record pointing to your droplet’s IP address:
- Name: @ (for root domain) or subdomain (e.g., “puzzles”)
- Directed to: Your droplet
- TTL: 3600 (default)
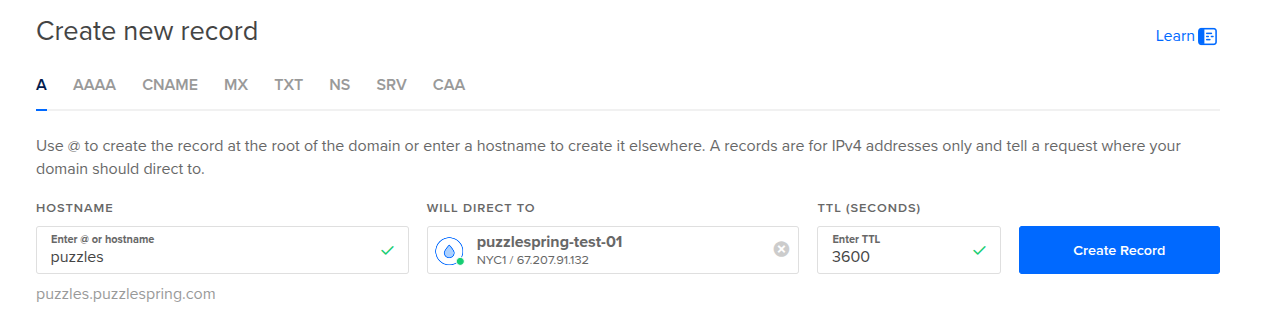 Figure 2: Setting up an A record in DigitalOcean’s DNS management interface
Option B: Domain Managed by Another Provider
If your domain is managed by another provider (like Namecheap, Cloudflare, Google Domains, etc.):
- Log in to your domain registrar’s website
- Navigate to the DNS management section
- Create an A record pointing to your droplet’s IP address:
- Host/Name: @ (for root domain) or subdomain (e.g., “puzzles”)
- Value/Points to: Your droplet’s IP address
- TTL: 3600 (or default)
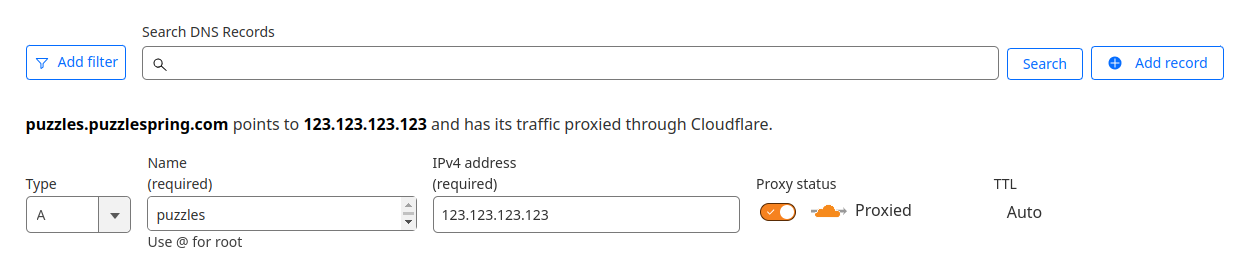 Figure 3: Example of configuring an A record in Cloudflare’s DNS management interface
 - Wait for DNS propagation (can take up to 24 hours, but often much faster)
You can verify DNS propagation using the dig command or online tools like dnschecker.org.
Step 3: Connect to Your Droplet
Connect to your droplet using SSH:
ssh root@your-droplet-ip
If you used password authentication, you’ll be prompted to enter your password.
Step 4: Deploy PuzzleSpring
Once connected to your droplet, follow these steps to deploy PuzzleSpring:
- Clone the PuzzleSpring repository:
git clone https://github.com/dlareau/puzzlespring.git
cd puzzlespring
- Create and configure your environment file:
cp sample.env .env
nano .env
- Update the following variables in your
.envfile:
# Required settings
DOMAIN=your-domain.com  # Use your actual domain or droplet IP
DB_PASSWORD=your-secure-password  # Create a strong password
DJANGO_SECRET_KEY=your-secure-key  # Generate a secure key (see below)

# Production settings
HTTP_PORT=80
HTTPS_PORT=443
To generate a secure Django secret key, you can use:
python3 -c 'from django.core.management.utils import get_random_secret_key; print(get_random_secret_key())'
- Start the application:
docker compose up -d
This will download all necessary Docker images and start the services. The first run may take several minutes.
- Run the initial setup:
docker compose exec app python manage.py initial_setup
Follow the interactive prompts to create your superuser account.
Step 5: Access Your PuzzleSpring Instance
If you configured a domain:
- Access your site at
https://your-domain.com
If you’re using the droplet’s IP address:
- Access your site at
https://your-droplet-ip
Log in with the superuser credentials you created during the initial setup.
Viewing Logs
To view logs for troubleshooting:
# View logs for all services
docker compose logs

# View logs for a specific service
docker compose logs app
docker compose logs caddy
Scaling Your Droplet
If you need more resources during a hunt:
- In the DigitalOcean dashboard, select your droplet
- Click on “Resize”
- Choose a larger plan
- Click “Resize”
This operation requires a brief downtime while the droplet restarts.
Troubleshooting
Common Issues
- SSL Certificate Issues
- Ensure your domain is correctly pointed to your droplet’s IP
- Check that ports 80 and 443 are open in your firewall
- Verify
DOMAINin your.envfile doesn’t include a port number
- Database Connection Issues
- Check your
DB_PASSWORDin the.envfile - Ensure the database container is running:
docker compose ps
- Check your
- Static Files Missing
- Run:
docker compose exec app python manage.py collectstatic --noinput
- Run:
Getting Help
If you encounter issues not covered in this guide:
- Check the PuzzleSpring documentation
- Look for similar issues in the GitHub repository